
Popsicle Holders Personalized

Use this fun project making popsicle holders to surprise someone special! This is such a great gift idea for the little one in your life!
Learn how to make personalized popsicle holders
Discover how to personalize your popsicle holders with Heat Transfer Vinyl (HTV) in this step-by-step guide. Learn how to create unique designs using HTV and bring a touch of creativity to your summertime treats. Get ready to make your popsicles even cooler!
See the full step by step video tutorial
How to make personalized popsicle holders Step by Step
Ready to make personalized popsicle holders? This post contains some affiliate links for your convenience! Read my full disclosure policy.
Materials you’ll need
Step by Step Instructions
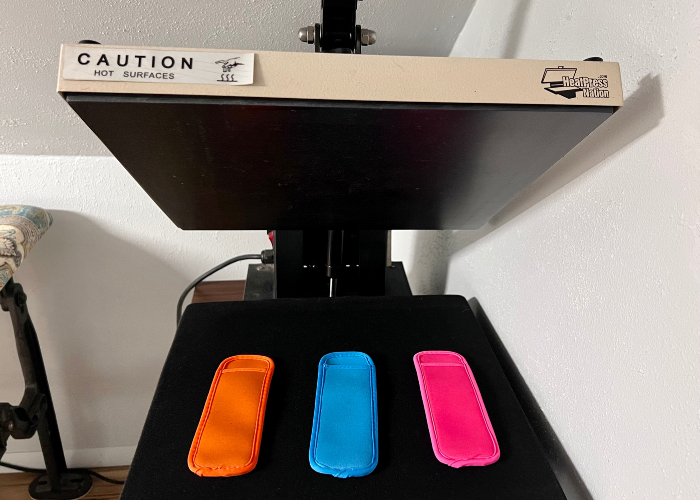
Step 1: Press the blank popsicle holders
Press the blank popsicle holders with your iron or heat press so they are dry for the heat transfer vinyl (htv). I typically set my heat press for 300 degrees and press for 12 or 13 seconds. It depends on the type of vinyl that you use. When you purchase it, there should be instructions on how to set the press.
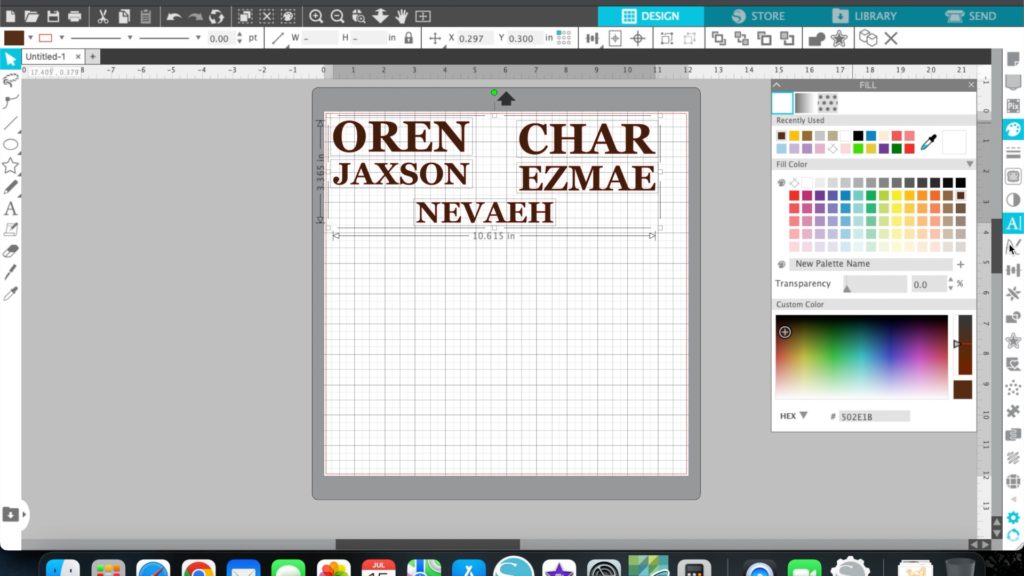
Step 2: Designing in Silhouette Studio
Enter whatever design that you want in the Silhouette Studio. I used my grandkids names to personalized their popsicle holders but any design will work. At this point, measure your holder and adjust the width and height of the design according to the specifications that were measured.
Adjust the cut settings (blade depth, speed, and force) based on the type and thickness of your HTV.
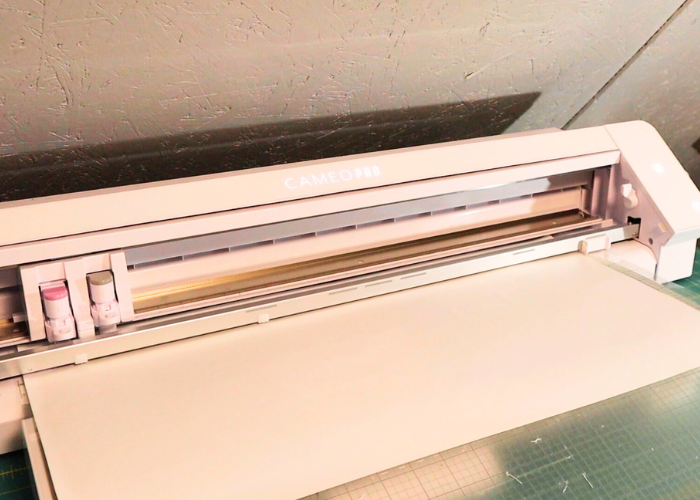
Step 3: Loading and Cutting the HTV
Once your design is ready, it’s time to cut the HTV with the Silhouette Cameo:
- Place your HTV sheet on the cutting mat with the shiny (carrier) side facing down.
- Align the cutting mat with the guides in the Silhouette Cameo.
- Connect your Silhouette Cameo to the computer and send the design to the machine using the Silhouette Studio software.
- Adjust the blade depth on the Cameo according to the recommended settings for your HTV type.
- Load the cutting mat into the Silhouette Cameo by feeding it into the machine until it grabs hold of the mat.
- Press the “Load” button on the machine or the arrow pointing up if it’s a Cameo 4.
- In Silhouette Studio, click on the “Send” button to start the cutting process. Make sure that the HTV is mirrored.
- Sit back and let the Silhouette Cameo work its magic.
Step 3: Weeding and Preparing for Heat Transfer
After the Silhouette Cameo has completed cutting, it’s time to weed and prepare the design for heat transfer:
- Carefully remove the HTV sheet from the cutting mat.
- Use weeding tools such as tweezers or a weeding hook to remove the excess HTV around the design. Be meticulous to avoid damaging the design.
- Once the excess HTV is removed, your design will be ready for heat transfer.

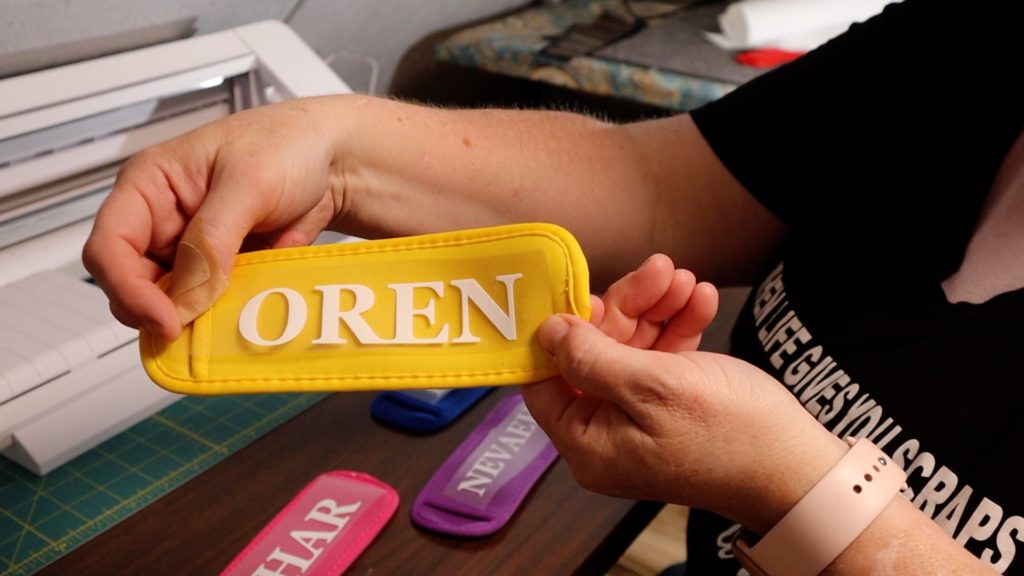
Step 5: Heat Transfer and Application To apply the HTV design to your popsicle holders:
- Preheat your heat press or iron to the appropriate temperature for your HTV and fabric type.
- Position your design on the popsicle holders, ensuring the carrier sheet is facing up and the design is facing down on the fabric.
- Apply heat and pressure using the heat press or iron according to the recommended guidelines for your HTV type. Make sure to apply even pressure and cover the design completely.
- Some HTV is a hot peel and some are cool peels. If you are using a cool peel, allow the design to cool down before peeling off the carrier sheet. This step is crucial to ensure the design adheres properly to the fabric.
- Voila! Admire your masterpiece and enjoy your personalized creation.
Personalizing the popsicle holders are simple but the kids will absolutely love them! Added bonus is that you’ll know whose is whose at first glance. I’m a grandma now but I remember how it was when my kids were little! We color coded everything! 🙂
If you loved this project, you’ll love these projects too:

Did you make this craft?
We would love to see what you have created so mention us @cuttingedgequilter or tag us using #ceqcreations so we can see your creations!